
IIS (Internet Information Services) is a web server service on Windows that supports HTML sites, ASP.NET or ASP applications. In this guide, we walk step by step through generating a CSR (Certificate Signing Request) and private key on IIS 10.x.
Similarities with IIS 7 and IIS 8 In fact, the CSR generation process on IIS 10.x is nearly identical to IIS 7 and IIS 8. So if you've done this on those versions before, you'll follow similar steps on IIS 10.x too.
Important Reminders We strongly recommend saving your password somewhere and backing up your keys when generating a CSR and private key. If you lose your password or keys, there is no way to recover them and we cannot help with this. We recommend using reliable storage to keep your backup files.
STEP 1: Generate a CSR Code on IIS 10.x
To generate a CSR code using IIS 10 or 10.5 on Microsoft Server 2016, follow these steps:
Open IIS Manager from the Start Menu
First, go to the Start Menu and search for "Internet Information Services (IIS) Manager". Internet Information Services (IIS) Manager will open.Select the Server Name
Click the server name in the left pane.Open Server Certificates
Go to the IIS section in the middle pane and double-click Server Certificates.

STEP 2: Create the Certificate Request
Go to the "Actions" pane on the right and click "Create Certificate Request".
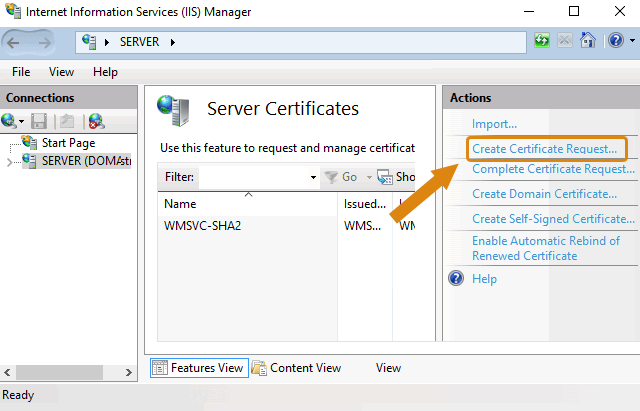
STEP 3: Fill In the Certificate Request Form
At this step, the Certificate Request Form Wizard will open. In the Distinguished Name Properties window, enter the following information:
In the Common Name field, enter the Fully Qualified Domain Name (FQDN) of the web address the certificate will be used for. Make sure the Common Name is the correct domain/FQDN that the CSR validates and that you'll use for the certificate. For a Wildcard SSL certificate, the Common Name must contain at least one asterisk (*). Example:
*.domain.tld,*.sub.domain.tldEnter the company name in the Organization field, and the organizational unit in the Organization Unit field.
Enter the company's location details: country, city and region.
Click Next.

STEP 4: Cryptographic Service Provider Settings
In the Cryptographic Service Provider Properties window, leave the default settings as they are:
- Microsoft RSA SChannel
- 2048-bit
Then click Next.

STEP 5: Save the CSR File
Enter a file name and location to save your CSR file. You'll need this CSR file when getting your IIS SSL certificate.
Click Finish.
Your new CSR file will be stored in Desktopcert_req.txt.

Step 6: Save the Private Key
- Go to the Certificates Section in the MMC Snap-in\nOpen MMC (Microsoft Management Console) from the Start Menu and go to the Certificates section.
- Select Requests\nSelect the Requests section in the left pane.
- Click All Tasks\nRight-click and select All Tasks.
- Select Export\nIn the menu that opens, click Export and follow the instructions to export your private key.
Tips
- When generating your CSR code, make sure to enter the full CSR text in the SSL creation form. Make sure the CSR text starts with ----- BEGIN CERTIFICATE REQUEST ----- and ends with ----- END CERTIFICATE REQUEST -----:
Can't find the answer you need?
Contact Us